As well as the traditional kit version of each pattern, there's now several other options of how you can get each design.
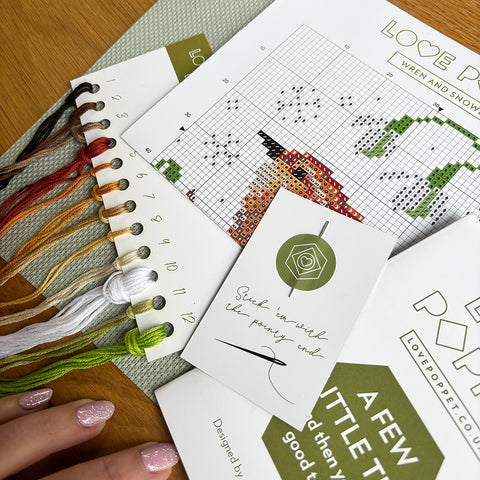
Under each Kit listing, there is an option to order a Printed Chart version. This is a great option for those who have loads of supplies but like to have their pattern printed out, but don't have a printer to hand.
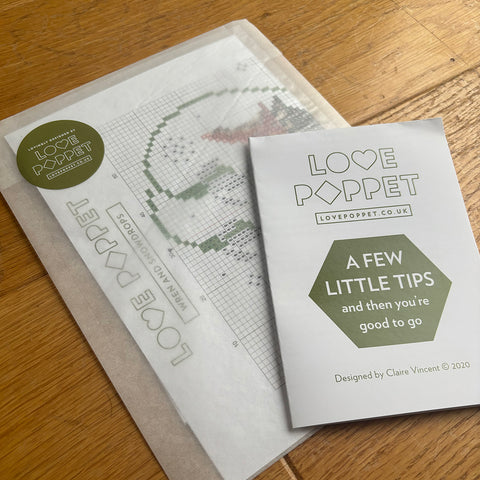
These are the same quality prints as those used in my kits. All are full colour with full colour key for the DMC colours needed.
The Printed Chart version comes in a glassine envelope (which is fully compostable) and also includes the A few little tips leaflet to help you get started.
Also, are you a Pattern Keeper or a Markup R-XP fan?
I think that there are many of you out there, and I was completely unaware of these apps popularity!
I have now added a Pattern Keeper/Markup R-XP friendly version to ALL my pdf downloads. So you can view and use the pattern in whichever way feels comfiest for you.
Obviously, if you ever have a problem downloading one of my files - just email me and I'll work out a way for you to get your file.
I have to admit, it was only a couple of years ago that I came across the term Biscournu. To me it sounds like it should be a biscuity/cake type of thing.
I'm a complete convert now and think these make a lovely present to be gifted to a fellow stitcher.
Step 1.
Start by cross stitching both the part 1 (top) and part 2 (bottom) patterns as you normally would, on separate pieces of Aida.
Step 2.
Then backstitch a border one row away from the edge of the design, going all the way around the outer edge of your finished design using a contrasting colour of thread.
Step 3.
Cut off spare Aida from all four edges, leaving I/2 an inch beyond the backstitch border - keeping the two pieces square.
Step 4.
Fold the edges of spare fabric back with your fingers.
Join a corner of the bottom pattern to the midway point on an edge of the top piece. Using a whip stitch, start sewing the top and bottom of your biscournu together along the backstitched border.
Step 5.
As you pass round a corner section, just keep going the same as on the sides. Although you may want to put extra stitches on the corner sections for strength.
Step 6.
Continue until you have nearly stitched the whole way round the design. Just leave a big enough gap for stuffing. Stuff the biscournu with toy stuffing.
Step 7.
Finish off stitching the sides, securing the thread with a hidden knot.
Step 8.
Sew two buttons - one in the centre of the top, one in the centre of the bottom, passing the thread through the centre of the biscournu to stitch both buttons using the same length of thread.
This is how you get the centre thinner and the corners to point out into the distinct shape of a biscournu.
And there you go, a beautiful pincushion - ready to gift!
If you'd like to stitch the pattern that was used in this tutorial, you can find the pattern pdf here: Spring Biscournu.
]]>
By now people will have received the first of the brand NEW Love Poppet Cross Stitch & Craft Subscription Box and are now enjoying it's contents.
If you are one of these lucky souls - feel free to share your images on social media by tagging in @lovepoppet_crossstitchandcraft and using the hashtag #reachforthestarsbox1 - I'd love to see them!
So I thought I'd show those who missed out just what came in Box 1 -
Reach for the Stars.
In this first box, everyone received:
• the full 'Reach for the Stars' cross stitch kit
• 6 inch hoop
• a magnetic needle-minder to keep your needle safe
• a beautiful rocket thread sorter
• 2 metres of cream star ribbon
• a pack of 3 Folk Stars Paper Decorations
• and some incredibly delicious star chocolates (to keep your energy up)
All this for an amazing £25!
Pre-order for the second box 'Noel' is now open, so don't forget to sign up if you haven't already - it'll close for pre-order on the 26th of October.
Box 2 will be sent out the week of the 9th on November. It'll be the perfect design to stitch in time for Christmas!
]]>
What better seaside to visit then Cromer, in Norfolk? There's lots to do and see there, but more importantly there's a brand new shop called 'Craft Room' on Garden Street. It's crammed full of craft kits from a variety of small independent businesses, most crafts you can think of including crotchet, knitting, embroidery, macramé, origami, sewing, painting, needle felting, punch needle, weaving, mosaics and cross stitch.
And I'm very pleased to say, you can now purchase Love Poppet Cross Stitch Kits from there too! The lovely Erica has become our latest stockist, so do pop in and have a look if you're local.
For more about Erica's shop:
https://artssupplier.com/2022/04/24/craft-room-craft-kit-shop-opens-in-cromer/
Whilst I design my cross stitch kits, I tend to end up doing most of stitching (lots of trial and error) in the evenings when we are all snuggled down watching some TV.
This has led my 12yr old daughter to dust off some old cross stitch kits of her own. You know the type of thing, the ones you buy for Chrimbo hoping they'll inspire her to forgo the lures of her ever-present iphone.
Anyway, she's started working her way through these kits but never seems to settle into it the same way that I would (once I get going I begrudge having to get up for anything, even to drink or go to the loo!).
Each time she wandered off for the odd minute or two, she'd come back only to realise she'd lost her needle in the process.
After a bit of fruitless hunting around. I'd Inevitably have to get up and help search for the misplaced needle before it was found in someone's foot.
So purely to help me have more relaxing evenings, I've created a set of magnetic needle minders based on my papercut designs and cross stitch kits. They are my dove, heart, squirrel and fox.
These are being released along with 4 new cross stitch kits which fit nicely into either 6 inch or 3 inch hoops.
The new 6 inch kits are to bring some joy to your life. One is 'Hello Sunshine' and the other is 'Dream Big'.
Then the new 3 inch kits were definitely made with my 12 yr old in mind. One is just simply 'Hi' and the other is 'Love You'. x
]]>I started creating the patterns last Summer, there is a LOT of stitching and re-stitching that goes into drawing up a pattern - I'm not sure I really appreciated that before. A few corrections and the odd colour change along the way and they came together nicely.
]]>Anyhow, over the years I've often turned back to cross stitch as something 'just for me'. I am a bit of a fiddler, and can never just sit and watch a film without my hands working in some way.
I love all the bright colours, and how an image comes together in almost pixels (it's what I see the crosses as, which I think goes with the whole graphic design background).
Here's a few of other people's designs that I've stitched over the years, and actually have up around my house:
(Left: Pretty Little London by Satsuma Street. Top right: Open Your heart by Stitchrovia. Bottom right: Hug by Emily Peacock)
Anyhow, this has now lead me on to dipping my toe into the whole cross stitch design world and made up some kits.
I started by releasing my fox and squirrel designs, which had previously been sold as papercuts. I like doing things in odd numbers (I know, weird!), so I also created a hedgehog to sit alongside with them - which ended up being the most popular!
I started creating the patterns last Summer, there is a LOT of stitching and re-stitching that goes into drawing up a pattern - I'm not sure I really appreciated that before. A few corrections and the odd colour change along the way and they came together nicely.
Thankfully, my hubby Nick designed me some beautiful packaging for the kits as I was getting a little 'fatigued' with it all. I'm so pleased with how they all look and can't believe my luck that they've started selling really well.
So I'm afraid, there will be far more coming out this year - as I've quite enjoyed the challenge of creating something completely new from scratch.
(Photo credit: Vanessa Lingwood @hoophaberdashery)
]]>It reminds me of this piece that I cut back in 2014.
]]>I'm a Graphic Designer, Paper Engineer (as in Pop-up book designer) and now maker/seller of Cards and Paper Gifts and of course my latest passion - Cross Stitch Patterns and kits!
Many years ago I started Love Poppet as a blog. I then went on to open an Etsy store, a Folksy store and then became a partner of Not On The High Street. Somehow along the way my blog was lost, but Love Poppet is still going strong.
I have a big love for paper and card and all it can do. After struggling to find cards that interest me, I decided to create my own fun and unique range. I love the challenge to come up with beautiful designs that I would be proud to see up on the wall. This challenge has now progressed into designing cross stitch patterns and all sorts of stitching goodies.
I create every cross stitch pattern and kit myself, in my small studio in Kent - which I share with my hubby Nick and our loopy, squirrel hating dog Wilf.
As a mum of two girls, I am often out and about and get most of my inspiration from nature and the local area. Now I'm also reluctantly becoming a runner, so we'll see how that inspires my designs.
Portraits by Becky Mursell
Size: including mount 30 x 25cm (10 x 12")
Supplied unframed but with a mount, with strong backing board in a cellophane bag. Fits a standard 10 x 12" size frame.
]]>
I'm also trying something new with this one - I'm offering this as an archival giclée print too, taken from the original papercut. It will be printed using fade resistant, gallery standard ink and acid free, matt white card.
Size: design 25 x 20cm, with mount 30 x 25cm (10 x 12").
Supplied unframed but with a mount, with strong backing board in a cellophane bag, fits standard 10 x 12" frame.
]]>